 Malcolm Owen
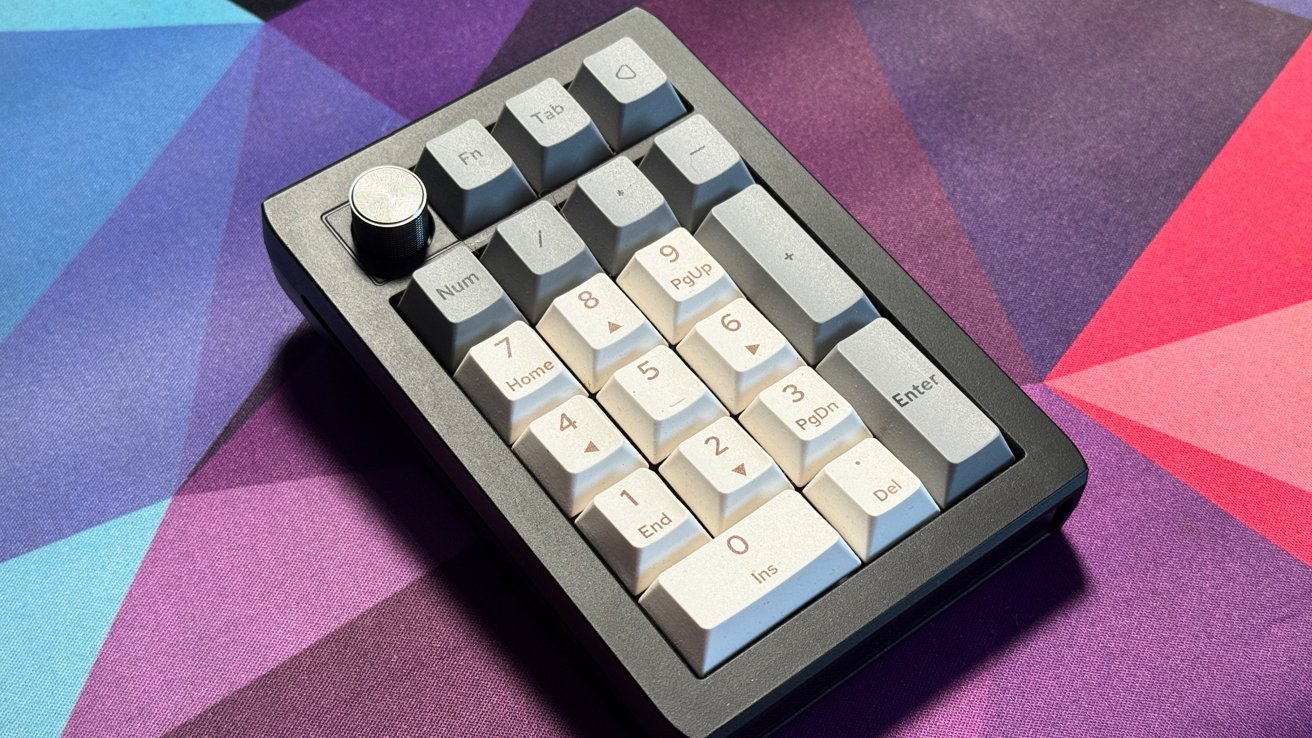
The Stream Deck is great for running macros on your Mac, but there are ways to do it significantly cheaper. Sometimes, all it takes is a spare keyboard or a secondary numpad.
In the pursuit of productivity, users can turn to macros as a way to get things done on their Mac. By hitting specific keys or key combinations on their keyboard, using configuration software supplied by the manufacturer, tasks can be sped up.
These are different from keyboard shortcuts, in that you often just have one action performed with keyboard shortcuts. Macros, however, can be complex enough to trigger multiple functions.
However, not everyone wants to spend time learning even more key combinations. That's why specialist products exist.
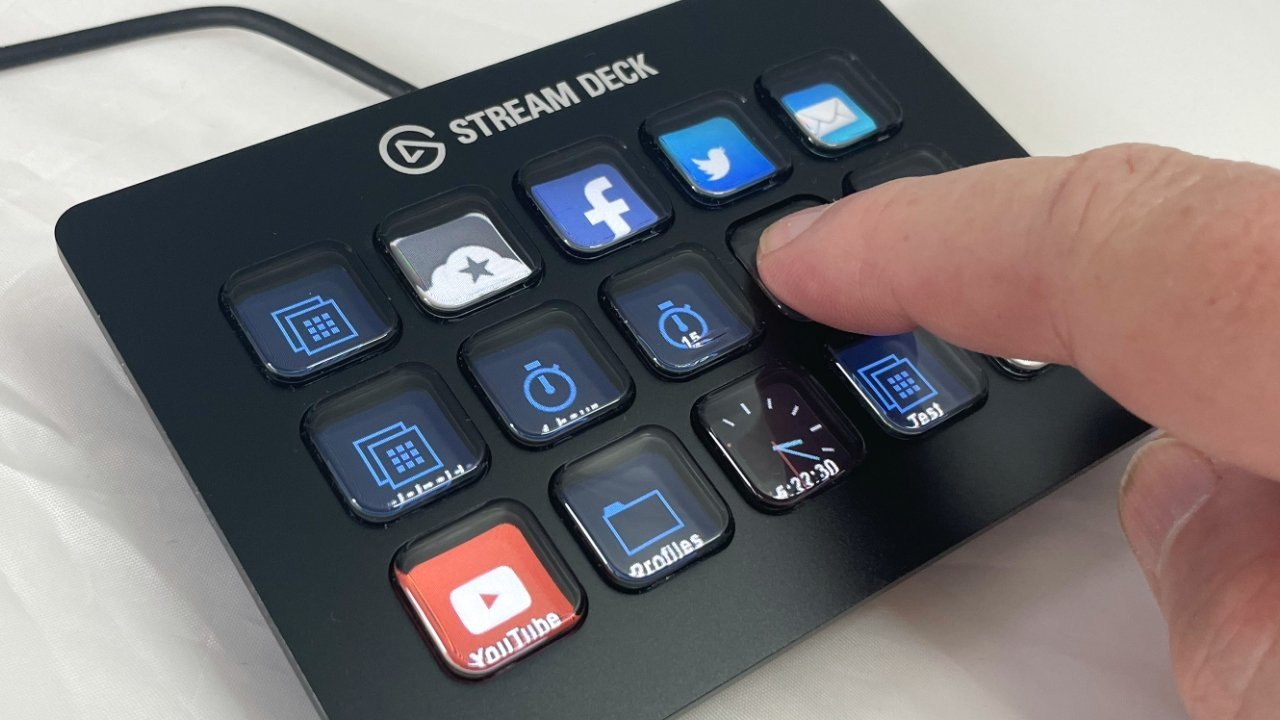 The Elgato Stream Deck is handy, but can be expensive.
 Items like the Elgato Stream Deck lineup are very useful, in that you can set up page after page of shortcuts to app functions that are quickly accessible, and can be changed easily. The Logitech MX Creative Console and the Flexbar do the same thing, in offering quick-to-access shortcuts that are not kept on your keyboard.
The problem is that going down that route can get expensive quickly. The normal 15-button Stream Deck Mk.2 is on Amazon, which is quite expensive, while the Stream Deck Neo is with eight buttons, and the Stream Deck Mini is with a mere six buttons.
The Logitech MX Creative Console isn't a massively better option, unless you want a massive dial, as that's as a package. The Flexbar, which harkens back to the Touch Bar of discontinued MacBook Pro models, is also a purchase that needs consideration at .
Finding a cheaper way to get more macro buttons, if you don't want the bells and whistles, is not that expensive to do.
Hardware choices
The first thing to consider is what you're going to actually use for this makeshift macropad. An obvious choice is to get a cheap one from Amazon, which probably will fit the bill just fine in most cases.
The problem here is that you're getting specific software for the task. If you have a spare keyboard or numpad laid around, they would be able to do the same thing, but without the extra outlay.
Of course, you cannot use them directly as a macropad, as macOS will try to use them for their intended purposes. Pressing the S key on the second keyboard will do exactly the same thing as the S key on the first.
 Aside from an emergency, a spare keyboard can also become useful as a macropad.
 If you do have to buy hardware, a macropad could be OK, but you could save some money and just get a separate numpad instead. You can get some cheap models for less than $20, even some name brand versions too for a little bit more.
In this case, we will be demonstrating with the numpad.
A secondary numpad or keyboard would be an ideal addition here. The only real difference will be how many macros you could assign, due to the number of physical keys.
Software - Configurators and Via
We are going to discuss two ways to use your extra typing hardware as a macropad. The first and arguably more immediate approach is to use the software that is supplied with your keyboard, if that applies to you.
If you're spending a fair amount of money on a keyboard, you'll often find that the manufacturer will have some software they want you to download and install. All so you can configure your peripheral how you want it.
Sometimes, this is a manufacturer's own app, but for mechanical keyboards, this is often , an online tool for keyboard management.
In many manufacturer apps, as well as Via, there are options to define a macro by recording your typing or by entering a script. You then assign that macro to a key, and crucially, you can do this on a per-keyboard level.
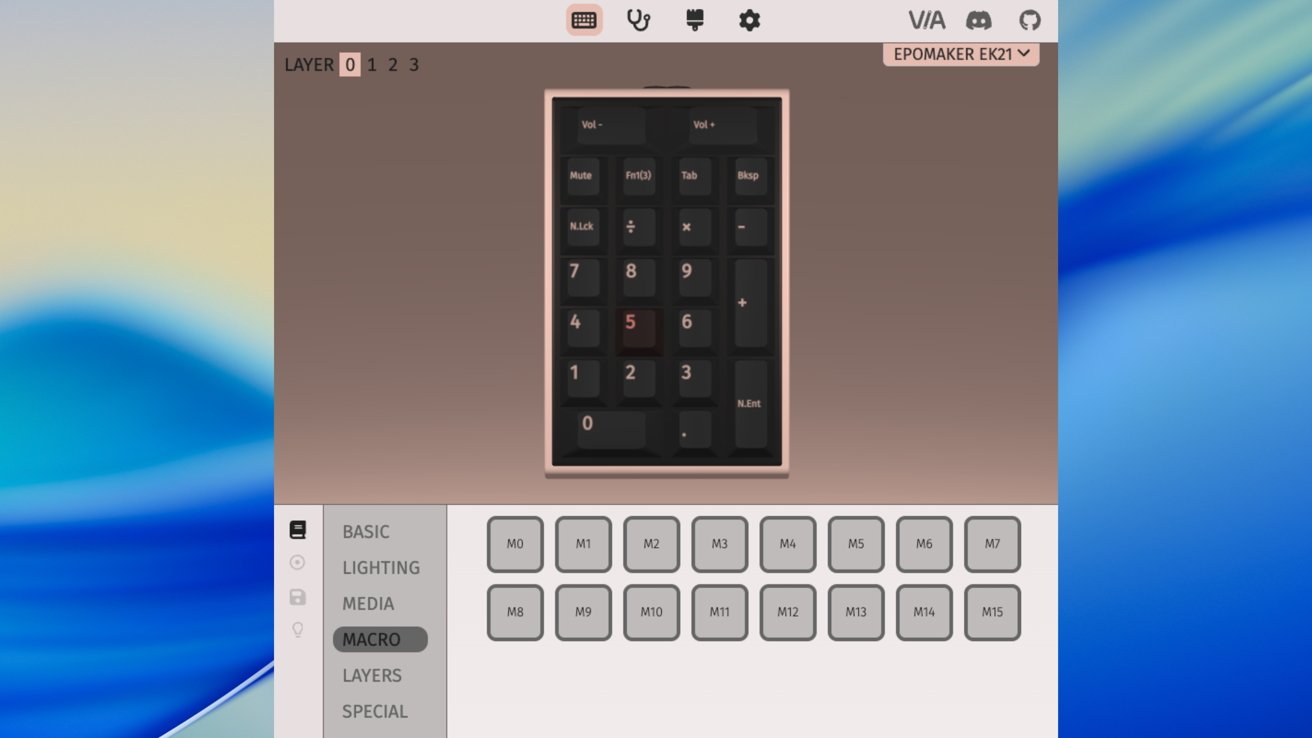 Assigning a macro to a numpad key in Via
It is possible to set up all of the numpad keys on a second physical numpad to be used for different shortcuts, without affecting any of the keys on your primary keyboard.
The only downside is that you are limited to the supplied software in terms of what macros you can make and how many you can assign. In the case of Via, it can have up to 16 macros, which covers most of the 20-key numpad on hand.
This is a decent approach if you don't want to fuss around too much with extra software. It's also quite easy to get going with, and if it's available, most people should stop here.
But, as always, you can go deeper.
Software - Karabiner-Elements
is a great piece of open-source software you can get for free on macOS. It supports macOS 13 Ventura to macOS 26 Tahoe, and both Intel and Apple Silicon Macs.
Much like Via, Karabiner-Elements is a keyboard customization tool, which lets you make changes to how your keyboards work within macOS.
It's also something that can get really complex, really quickly. Unlike Via, it does involve a download and a lengthy installer, including granting various permissions within macOS.
Getting into the tool, it gives you a massive capability to control all or specific keyboards connected to the Mac.
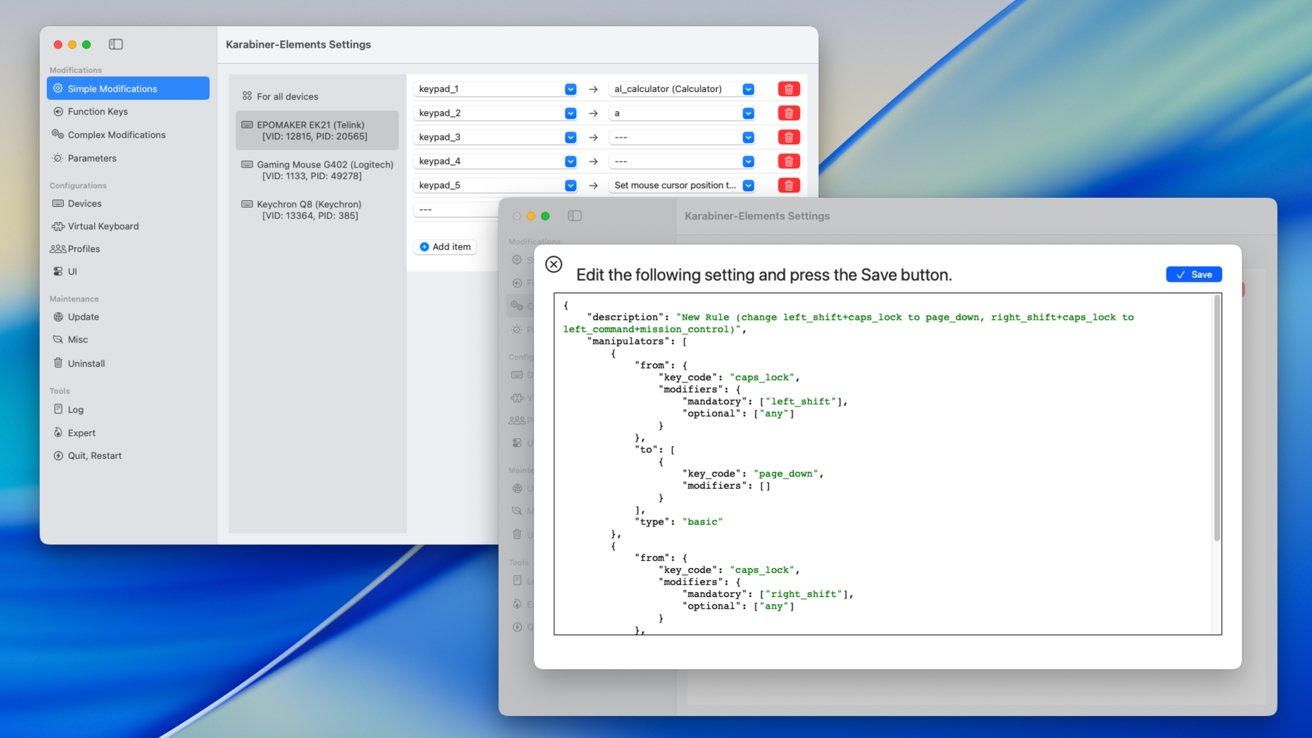 Adjusting key functions in Karabiner-Elements
On the simple side, you can select Simple Modifications and then the Macropad, then use the dropdowns to create items. In this case, you could set the numpad number 5 to move the mouse cursor to the center of your screen, to quickly find it.
The real key of the app is in its Complex Modifications section, where you add rules for keys. In effect, these are macros and alternate shortcut commands.
Handily, the community surrounding Karabiner-Elements has already made , so a lot of the time you can simply download the rules and apply them.
There is also an entire scripting language available for defining rules, which you can assign to a key. If you have a really specific macro goal in mind and nothing else has reached it so far, this would be where you should look.
Siri Shortcuts
While a lot of this has to do with physical key presses performing tasks, it is also worth considering how this could be applied in other ways.
One could be to take advantage of Siri Shortcuts. Since it is possible to assign a keyboard shortcut to a Siri Shortcut, it's feasible to have an entire macropad full of Siri Shortcuts, instead of manually triggering them or invoking Siri.
In the Shortcuts macOS app, open a shortcut for editing, then tap the information icon on the right-hand side. Under Details, select Add Keyboard Shortcut and add one there.
You probably won't be able to set a single numpad key press from a secondary keyboard to trigger the shortcut. What you can do is set up a brand new keyboard shortcut, then use a macro or rule to map that keyboard shortcut as a macro to the keyboard.
It's a roundabout way of doing things, but it does open up a world of new productivity options for the right person.


 Wesley Hilliard
 Marko Zivkovic
 Andrew Orr


There are no Comments Here, Yet